Creating and Configuring a Project
Walk through project creation, then set up metadata, upload files, manage credits, and assign tasks to get a release ready for distribution.
- 1
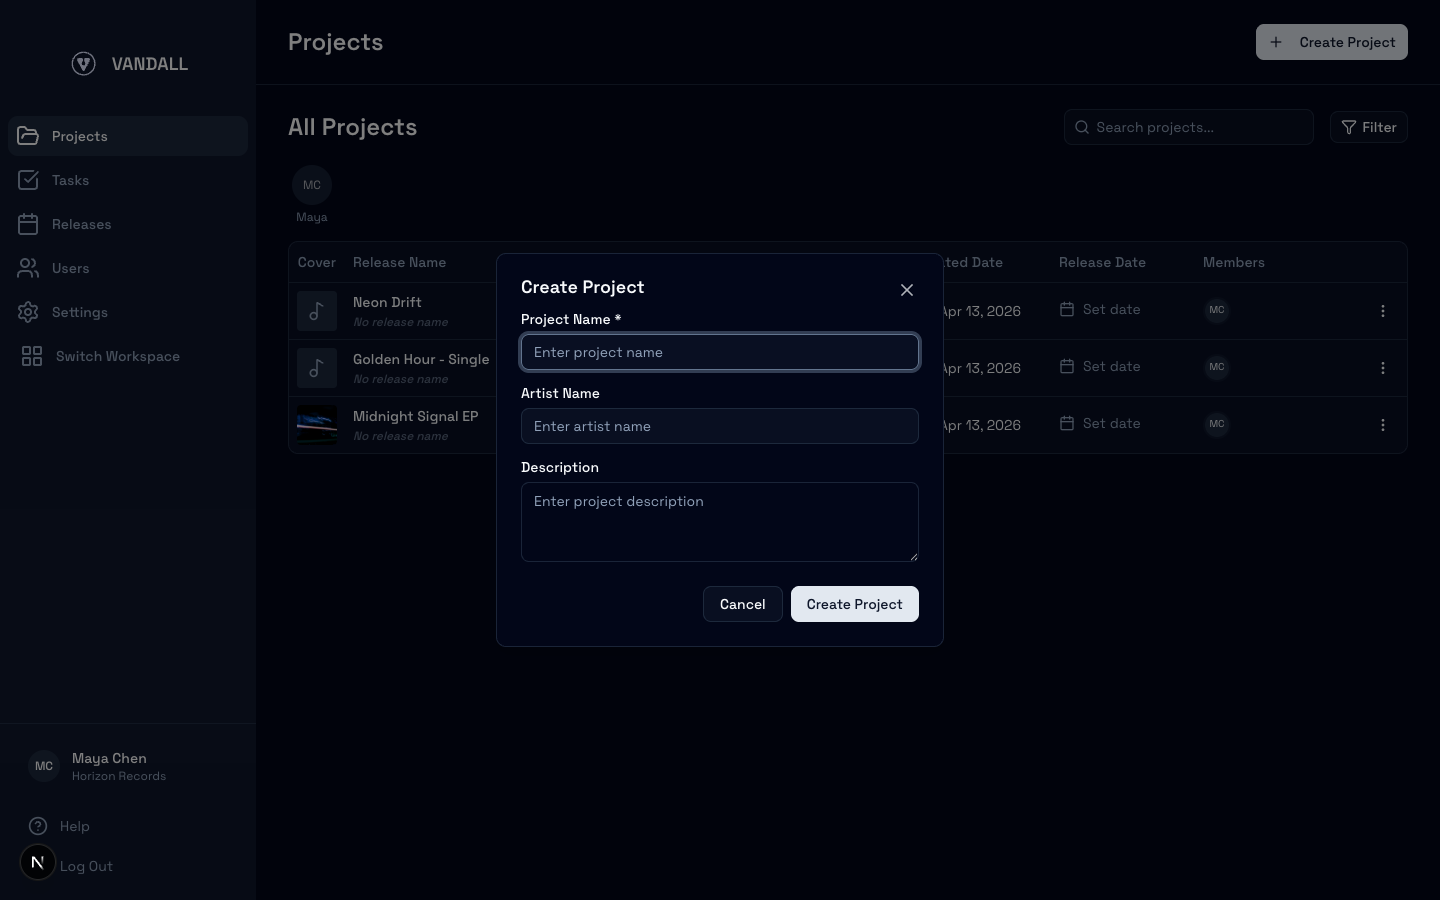
Open the "New Project" dialog
From the Projects list, click "New Project" in the top-right corner. The dialog has two required fields — Project Name and Artist Name — plus an optional Description field.
- 2
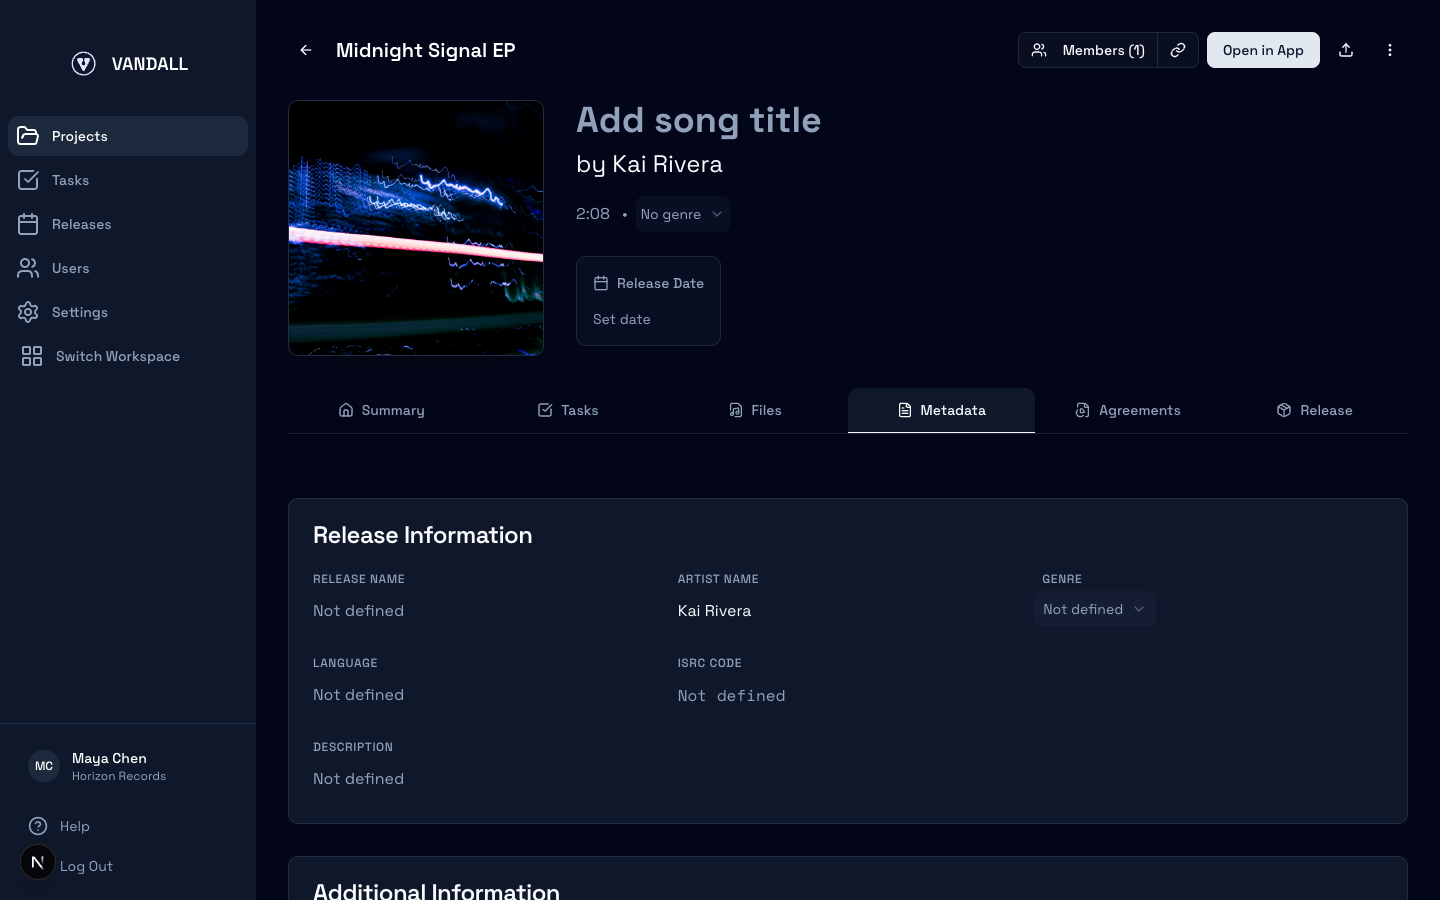
Fill in project metadata
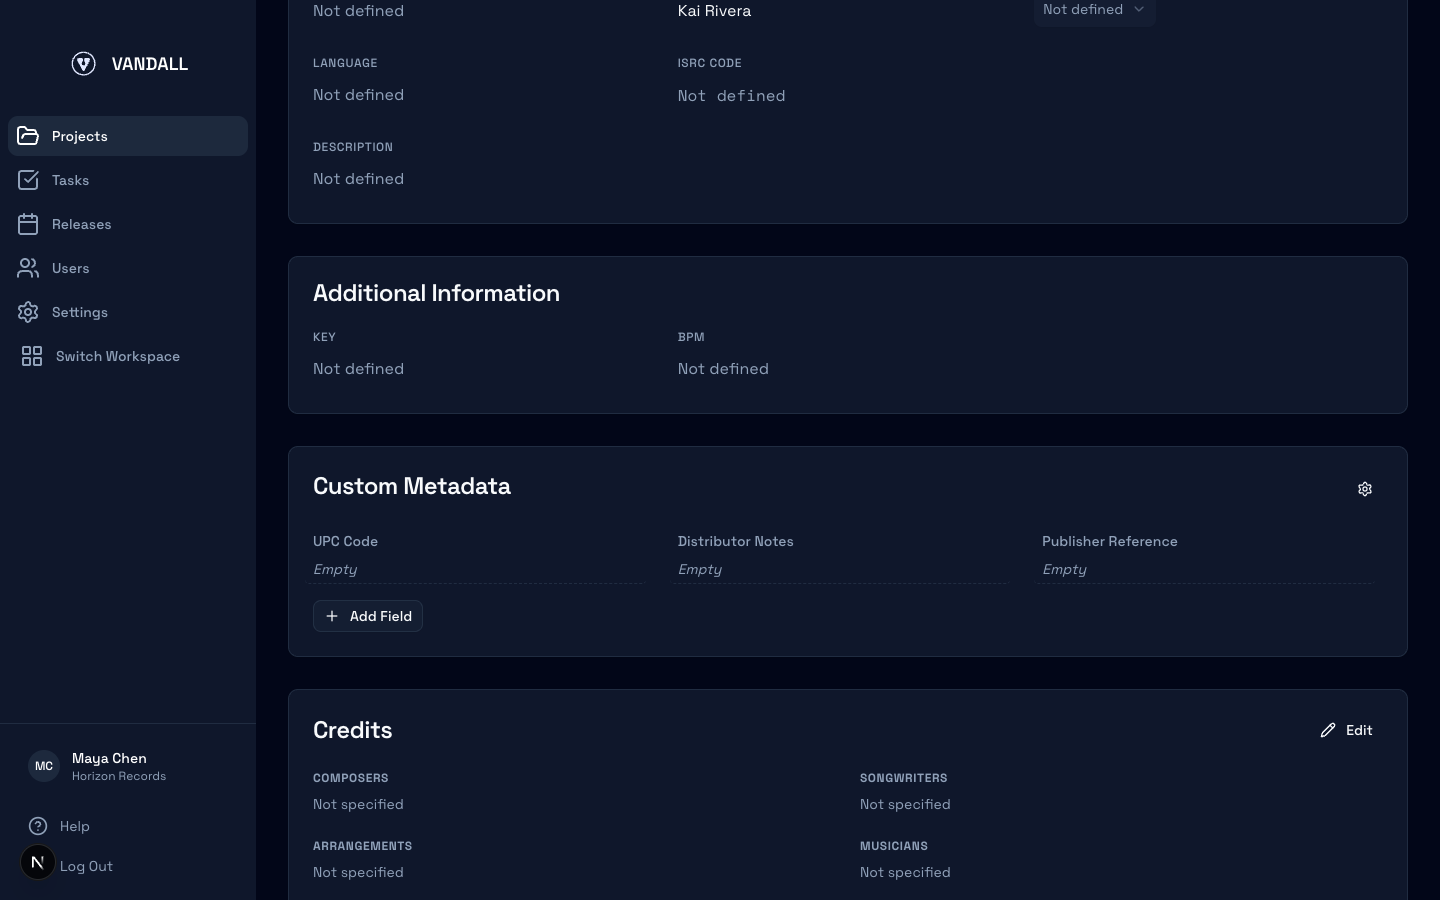
After creation, open the "Metadata" tab. Enter the information distributors need: Release Name, Artist Name, Genre, Language, and ISRC code. Below that you'll find BPM (20-300), musical Key, and flags for Instrumental and Explicit Lyrics.
- 3
Add credits
Scroll down on the Metadata tab to the Credits section. You'll see a read-only card listing all credited contributors grouped by role. Click "Edit" to open the credits editor. Add people and toggle role pills — Primary Artist, Featured Artist, Producer, Composer, Lyricist, Songwriter, Mixing Engineer, Mastering Engineer, and more. You can assign multiple roles to one person. Click "Save" when done.
- 4
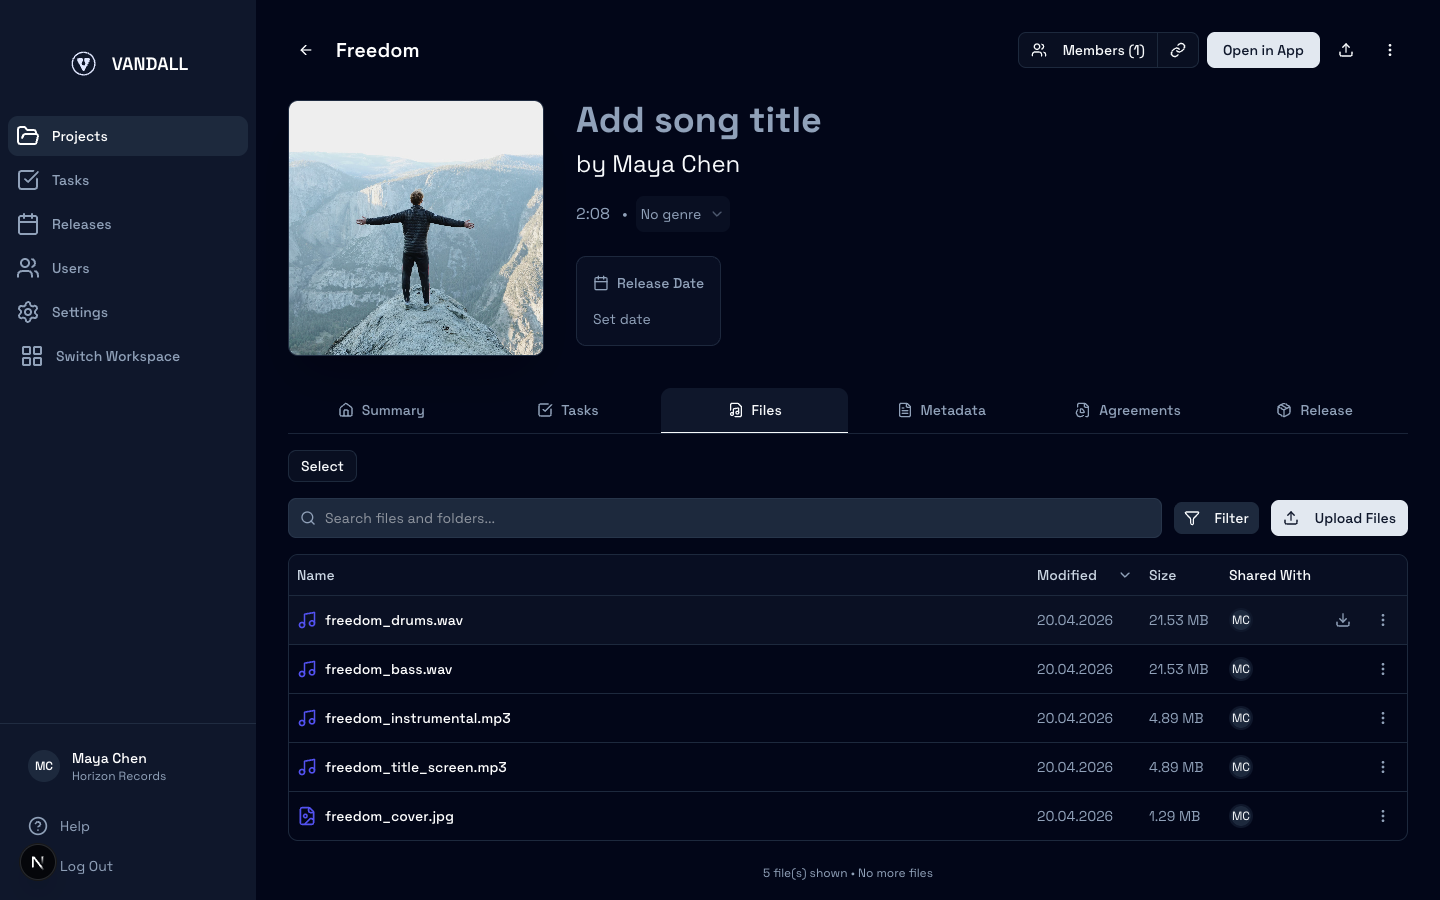
Upload audio and artwork
Switch to the "Files" tab and drag-and-drop or click to upload. Audio files (WAV, FLAC, MP3) automatically get duration, bitrate, sample rate, and waveform metadata extracted. Click any file to preview it — play audio with waveform visualization, view images, or read PDFs inline. The preview sidebar shows file details and a comment thread.
- 5
Set a release date
Go to the "Summary" tab and set your target release date. This appears on the Releases calendar so your whole team can see what's coming up. You can also add internal notes and tags.
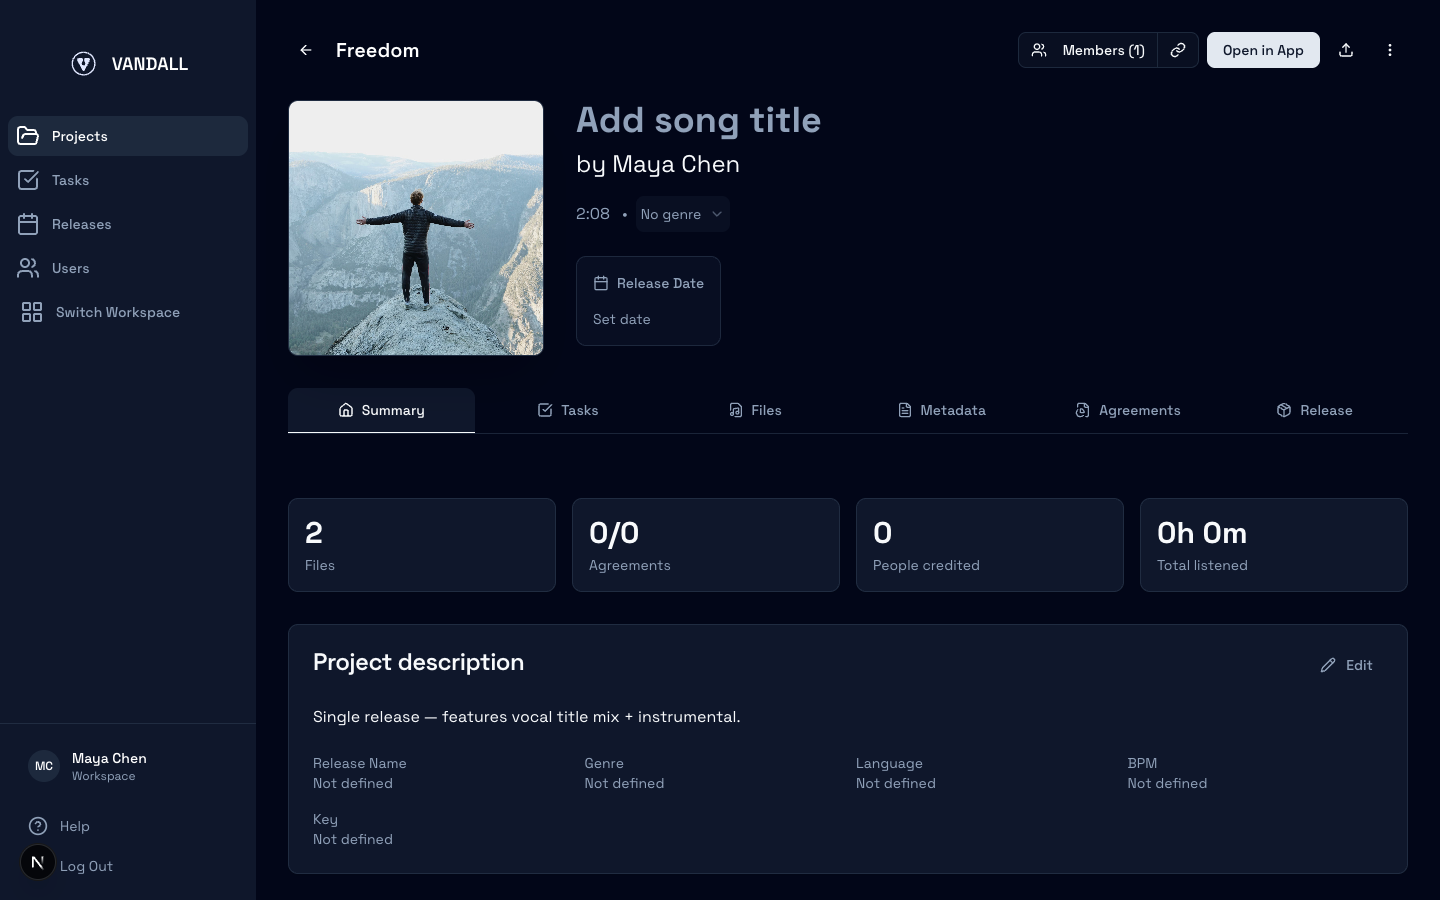
- 6
Track completion
The "Stats" tab shows metadata completion percentage, file count, agreement count, and credit count. Use this as your pre-distribution checklist — when everything is at 100% and all agreements are signed, the release is ready.
Tips
- Create credits at the same time as the project — don't wait until release day.
- Use the Stats tab as your go/no-go checklist before distribution.
Was this guide helpful?
If something's unclear or missing, send us a note and we'll reply with the right answer or update the guide.