Importing a Back-Catalog from CSV
Move an existing catalog from spreadsheets or another tool into Vandall without losing custom fields, dates, or artist data.
In short
- Test with 5-10 rows before migrating hundreds.
- Unknown columns auto-become custom metadata fields — no manual setup needed.
- Date formats (day-first vs month-first) normalise automatically per column.
- 1
Export your existing catalog as CSV
From Google Sheets, Excel, Trello, or Airtable, export the catalog as CSV or TSV with column headers in row 1. Include one project per row and split multi-value fields (like co-producers) into separate columns. The Import wizard reads the header row to map columns.
- 2
Prep artist and date columns
Artist Name should be a single column. Dates can be day-first or month-first — the wizard normalizes both — but each column should be consistent. If you have "Status" or "Distributor" columns, keep them; they become custom metadata fields automatically.
- One column per meaningful field. Don't cram multiple values into a comma-separated cell.
- If an artist appears across many rows, they dedupe into the roster automatically.
- 3
Open the Import wizard
Go to Settings (Owner only) and click the Import tab. Drag your file into the upload step or click to browse. The wizard is four steps: Upload, Map Fields, Preview, Import.
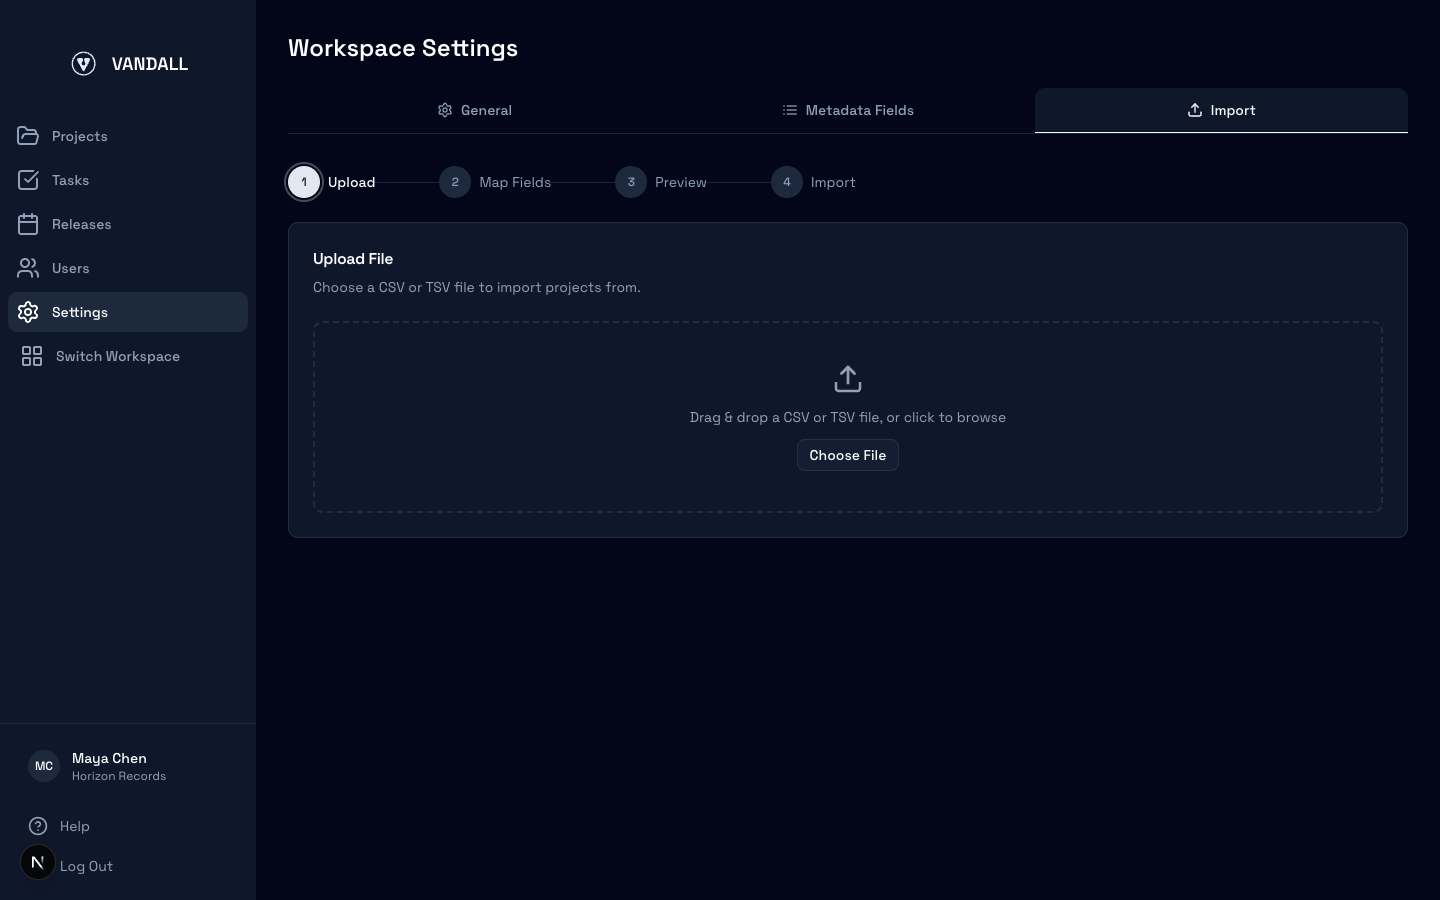
Drag-drop or click to browse — both CSV and TSV are accepted. - 4
Map columns
The mapping step shows each CSV column with sample data. Match known columns to Vandall fields (Project Name, Artist Name, Release Date, Genre, ISRC, BPM). Leave unknown columns as-is — they create custom metadata fields, visible on every project's Metadata tab.
- 5
Fix issues in Preview
The Preview step highlights rows with validation errors — invalid ISRC format, missing required fields, unparseable dates. Edit cells inline or uncheck rows to exclude them. Start with a 5-10 row test import to confirm the mapping before running the full catalog.
- 6
Run the import and verify
Click Import. All projects are created in one batch. After it completes, open Projects and spot-check the custom metadata fields you mapped — they should appear on every imported project. Dates map onto the Releases calendar immediately.
- 7
Clean up after import
Open Settings > Metadata Fields and reorder custom fields so the most important ones appear first on every project. Delete any that turned out noisy — deleting a custom field clears it from every project in one action.
Tips
- Test with 5-10 rows before the full import. You catch format issues without rolling them across hundreds of projects.
- If artists repeat across rows, they dedupe into the roster automatically — no separate artist sheet needed.
Was this guide helpful?
If something's unclear or missing, send us a note and we'll reply with the right answer or update the guide.